
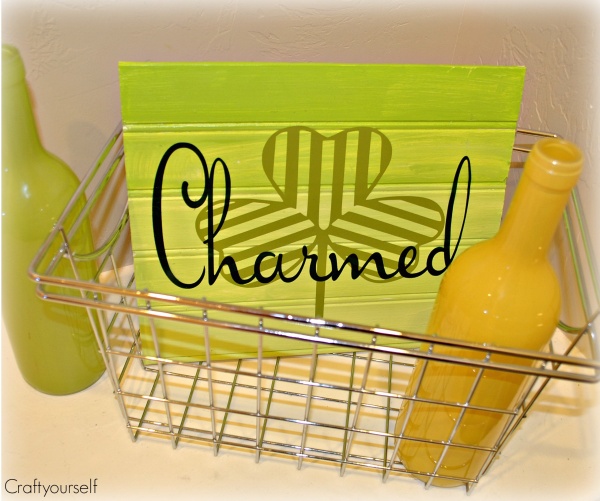
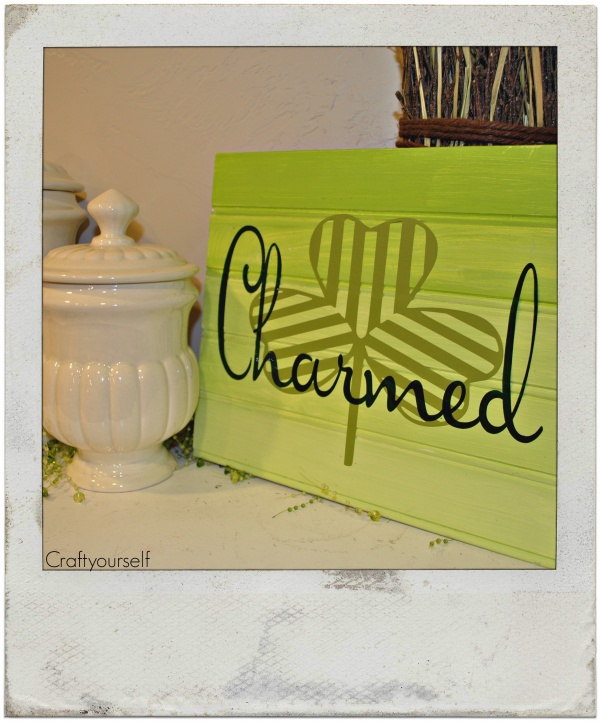
Beadboard Ombre’ Charmed St. Patrick’s Board
St. Patrick’s day is just around the corner and this year we are whipping up some really cute ideas. I’ll show you that it is easy to make a creative St. Patrick’s day décor by doing a step by step tutorial on how to make a Beadboard Ombre Charmed board.
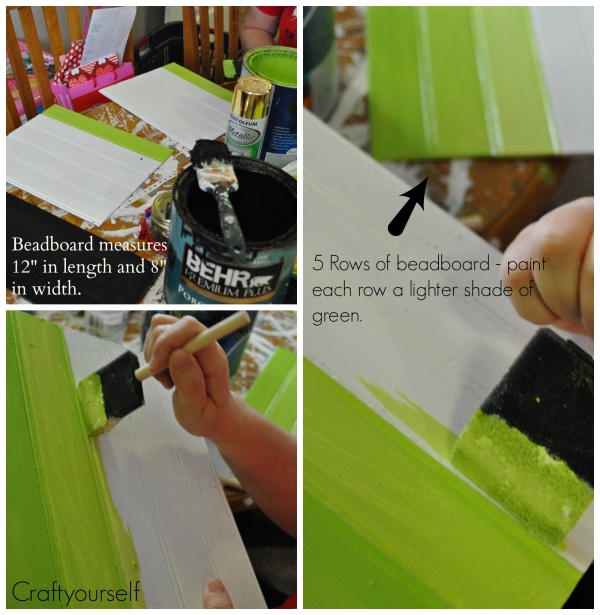
First you will want to gather what type of board you would like to use, as you can see I used beadboard.
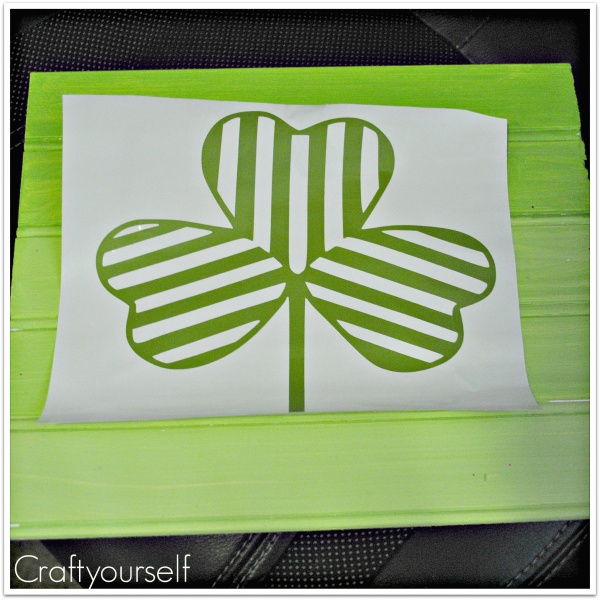
Once the board is painted in the different shades of green it needs some drying time. While drying you can find the image you would like to use behind the word “charmed”. The Silhouette online store had this cute lined Shamrock that we used. You can easily purchase it for yourself and use it too if you’d like.
Cut out the clover on your own personal cutting machine in a different shade of green. Once cut out then weed out the unnecessary vinyl from around your shamrock. Using transfer tape take the image and transfer it to your dried green Ombre’ board.
Here is the shamrock on the vinyl paper all weeded out before it is transferred to the board.
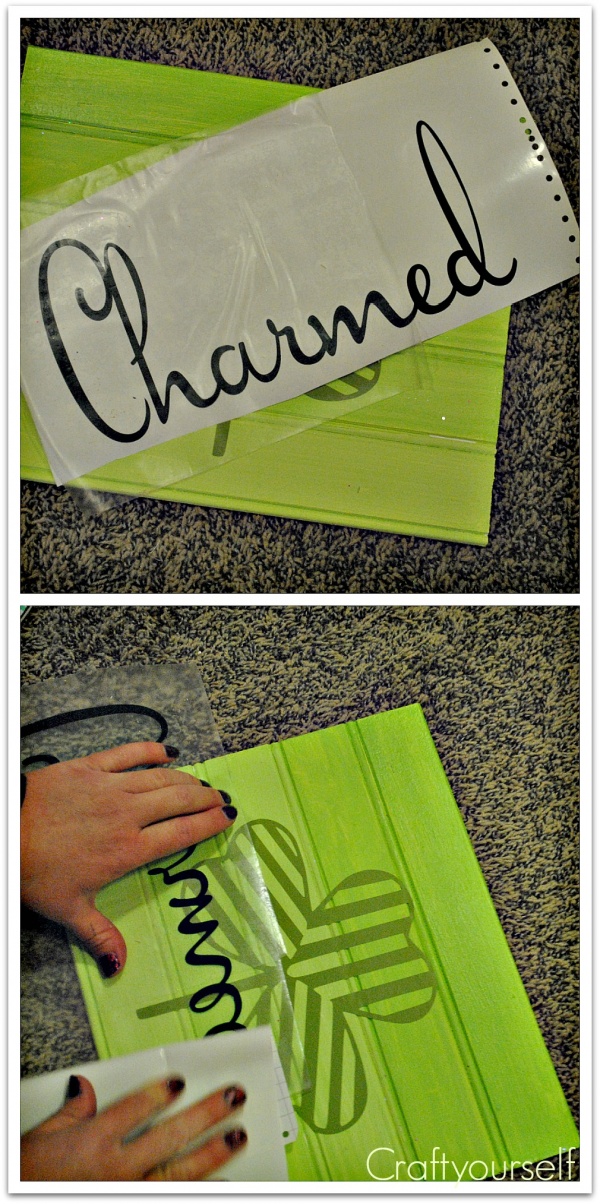
Next step you’ll go back to your cutting machine, pick out the font you want to use, measure your board (both width and length) to know how big you want your wording. We used the font “Doris Day” for our word “Charmed”. Type in your word and cut away! If you are not sure how to use your cutting machine both Cricut and Silhouette have great tutorials on You tube. Both Krystal and I have different machines so we use the Silhouette for some of the cutting and Cricut for other cutting. Each machine has great features.
Use the transfer tape and transfer the word “charmed” over top of the Clover.
This is they type of transfer tape that I prefer to use and you can purchase it at Amazon –
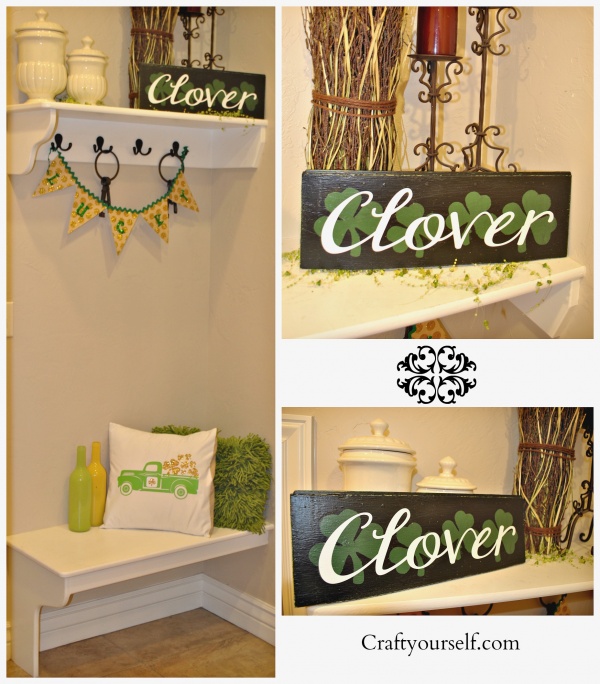
Layering vinyl can add so much character to a craft. Happy St. Patrick’s day enjoy!

18 Comments
Jeanette
OHH I love this! I always like to do crafts like this! This weekend it is supposed to rain so it its a perfect weekend to do this!
Alli Smith
I love this! I know I have some beadboard somewhere in my craft stash. What a fun DIY project to celebrate St. Patrick’s Day!
Paula Schuck
That is so cute! I have to make this. It’s going to have pride of place in my St. Patty’s decor from now on.
Candy
I have never used transfer paper befor. Fun easy enough craft to accomplish.
Miranda
Oh wow! I love this! The ideas are really creative.
I think this year I may make something as well just to bring some Irish lock to my apartment
Tatanisha Worthey
This looks so easy! It’s absolutely adorable and I live decorating for any holiday, especially when green is involved!
Kimberly
This is too cute! This would actually be perfect in my kitchen and I have a spot for it too! It isn’t a very complicated craft either! Thank you so much for sharing the how-to!
Pam Wattenbarger
This is so cute. I love the ombre look on this. It’s so easy to make, too. I can’t believe it’s already time to decorate for St. Patrick’s Day.
Annemarie LeBlanc
This craft turned out beautiful! Nice decor for St. Patrick’s Day. I wish I was as crafty as you. I’d fill my house with crafts if I had at least a fourth of your talent.
Kathy Myers
I wish I was crafty. I try but my stuff never turns out. This is so darling and looks easy enough. I might could actually make one!!
Tamara
So cute. My daughter loves St. Patrick’s Day and I admit – I do too! It’s fun to decorate and celebrate.
Danik
This will keep the kids entertained 🙂
Nikka Shae
This is so creative and I love how you designed this I need to find something fun like this!
Amanda
What a beautiful decoration! I am all about ombre and love the subtle colors you chose. Can’t wait to celebrate my Irish heritage on St. Patrick’s Day!
Dawn McAlexander
That is so neat! It brings a pop of color, not just for St. Patrick’s Day, but for any day. I really like the looks of this board.
Emma Spellman
That came out so cute! I am working on getting craftier. I think that’s a word. Haha. I will have to give this one a shot I don’t have any st Patrick’s decor yet.
Paula Bendfeldt Diaz
Love how this came out and it looks like such a great DIY project to do for St Patricks Day. Thanks!
Mimi Green
I’m loving the ombre board, you can do so much with this. I have an idea that would be super cute in my office.