

“DIY” Gift shop clock
“DIY” Gift shop clock
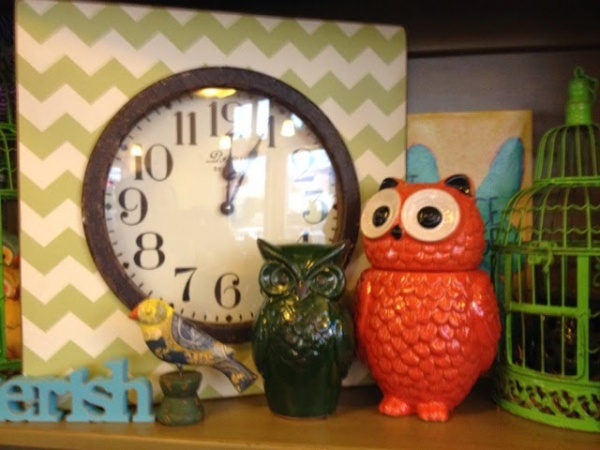
I was in a gift shop last week and fell in love with this clock. It was mounted on this cute chevron board. The price was out of this world. I decide I would give it a try and make one on my own. Plus, I thought it would help freshen up my home for spring and Easter! I love to change things around in my home and The white and teal color is so light and airy!
During my Garage sale adventures. I found this clock and paper covered frame. I scored a serious deal. Because, it was late in the day the lady sold me these and some other stuff for $1. 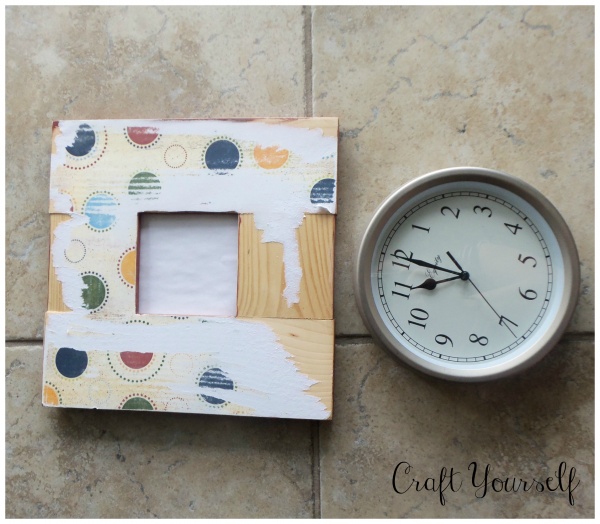
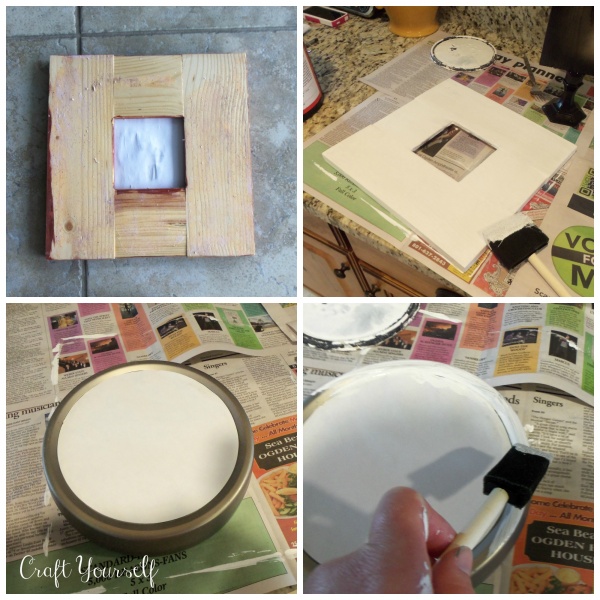
First I stripped the paper from the frame and sanded the wood down. Next, I painted the frame white. While I was waiting for the frame to dry I covered the face of the clock with some paper (I custom cut it to match and taped it down) Then I painted a layer of white for the primer once that was dry I painted a layer of chocolate brown, around the frame of the clock.
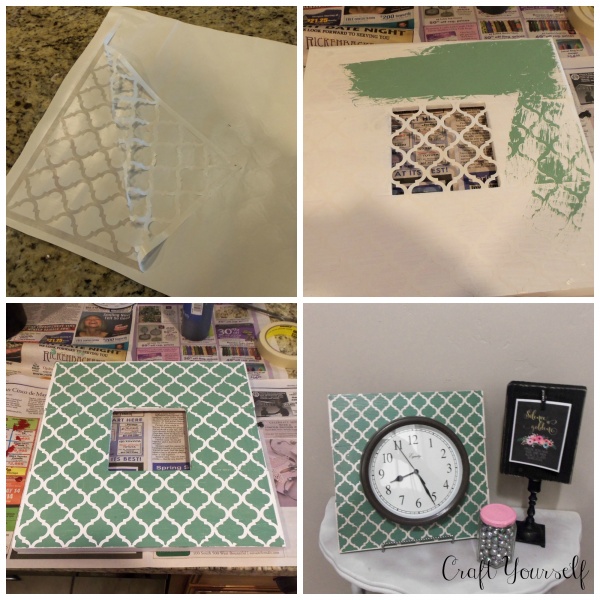
Once the white on the frame was dry I decided it was time to choose how the frame would look. I love Chevron! I already have a lot of Chevron in my home so I chose a beautiful Spanish Tile background. Using my Silhouette Machine. I cut the background Stencil out of contact paper. My frame measures 12″ x 12″. Which made it really easy to set up and cut on the Silhouette. I found the SVG file for FREE on Birdscards.com She has some really amazing FREE files! Thank you birdscard!! At this point once the stencil is cut you can pull your stencil off of the backing and stick onto the frame. Paint your second color and let it dry, remove the contact paper stencil. Last step was to glue the clock on the board using E6000 glue. The frame worked out well. Because of the hole in the frame it gives you access to the back of the clock to replace the battery and change the time. This is my $1.00 version of the expensive gift shop clock!


14 Comments
Katie
I would never in a million years guess that someone made that! It turned out great!
Liz Mays
You are SO good at this crafting thing. The clock is beautiful and would look beautiful anywhere!
Crystal
What a fun way to add a little personality to your home. Clocks can be pretty utilitarian, so why not spruce them up? Very cute!
Jen - Life With Levi
When I saw your first picture, I totally thought you had used patterned cardstock or contact paper. I never would have guessed you used a Silhouette stencil – that’s brilliant! It looks really good, too.
Tiffanie Doyle
Cute!!! I would have never thought that was a stencil. Love that you got the frame and clock for $1.00. Score!!!
Alicia
You’re great at being crafty for sure! My son actually just got a clock that he wanted for review but this would be a great idea to do with my daughter!
Patty
It is really lovely. I love teal too. No one would ever guess that it was made with garage sale bargains!
Jeannette
How cute and easy! This would make a perfect Mother’s Day gift too! I’ll be making on in the colors of my home soon!
Allison
Really, really cute! I grew up going to garage sales and getting inspired by items that I saw or bought – now living in nyc, I miss out on all that and miss it!
Ellen ThatChicMom
What a cute idea this turned out really nice! I love the patterned background.
HilLesha
I love it! It is really cute. I need to start getting into DIY projects more. 🙂
jasmine
Always love your DIYs! This one is amazing
Jennifer H
Wow – what a cool design! It turned out fabulous.
Shasta
I love this idea. My mom and I make a lot of crafts together and I would love to do this with her. Thanks for sharing such a cute and crafty idea!