
Living room make over reveal and decorating ideas
My sister’s living room make over reveal
I had the opportunity to make over my sister’s living room. It was such a whirlwind putting it all together that some of my pictures are from my phone, her phone and her camera. The transformation was fun to watch and we did it on a pretty strict budget. I would say overall this living room makeover was done for under $100.00
Now some people will ask how I could do it for so cheap? Let me tell you two words… GARAGE SALES. One man’s junk is another mans treasure. It is amazing what paint, spray paint and old frames, fabric, and time can do.
I told my sister to start painting her walls before I drove down to her house (she lives and hour south of me) In the mean time I painted and put together some frames, some subway art and a canvas or two. I also picked out some fabric for her curtains.
Here is her before picture of her living room. Some of the colors look a little off but it was a pale light green color. Now mind you she had a lot of browns and blacks. We did not replace any furniture. Her lamps too were brown with brown shades.

She opted with a grey color with white accents – she wanted to lighten up the room (which I don’t blame her) She found a picture on Pinterest of what she was going for and she wanted stripes! Big bold stripes. Now since I wasn’t there during this transition I wasn’t in on how difficult it was but after she told me I realized it took 4 hours alone just to do the stripes! Yikes! but they turned out darling!!

Look how cute those stripes are!!!
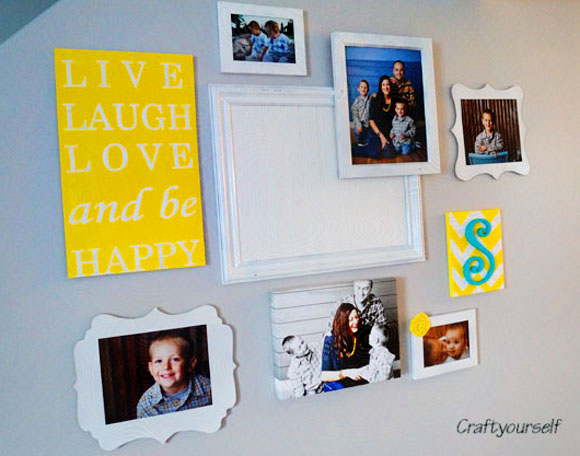
Next step was putting the room all together. My sister wanted a framed gallery wall which is really popular right now and a very cute way to display pictures. Have I ever mentioned how much I love my girlfriend Krystal? So she came up with some amazing frames that I messed around with to create a gallery with.
I took one of the large frames and added bead board to the back. Yes bead board that I got from a garbage pile at a new construction site. I am openly admitting a scrounge through home builders garbage piles to find wood.. there I said it.
Now that I have that out in the open let’s move on. My sister found a cute wall on Pinterest (of course) that we copied well somewhat copied – I couldn’t cough up the money to pay for frames nor could my sister so we did it garage sale style. The inspiration was found at Tater Tots and jello
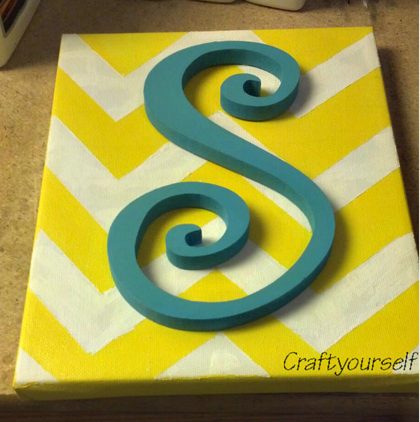
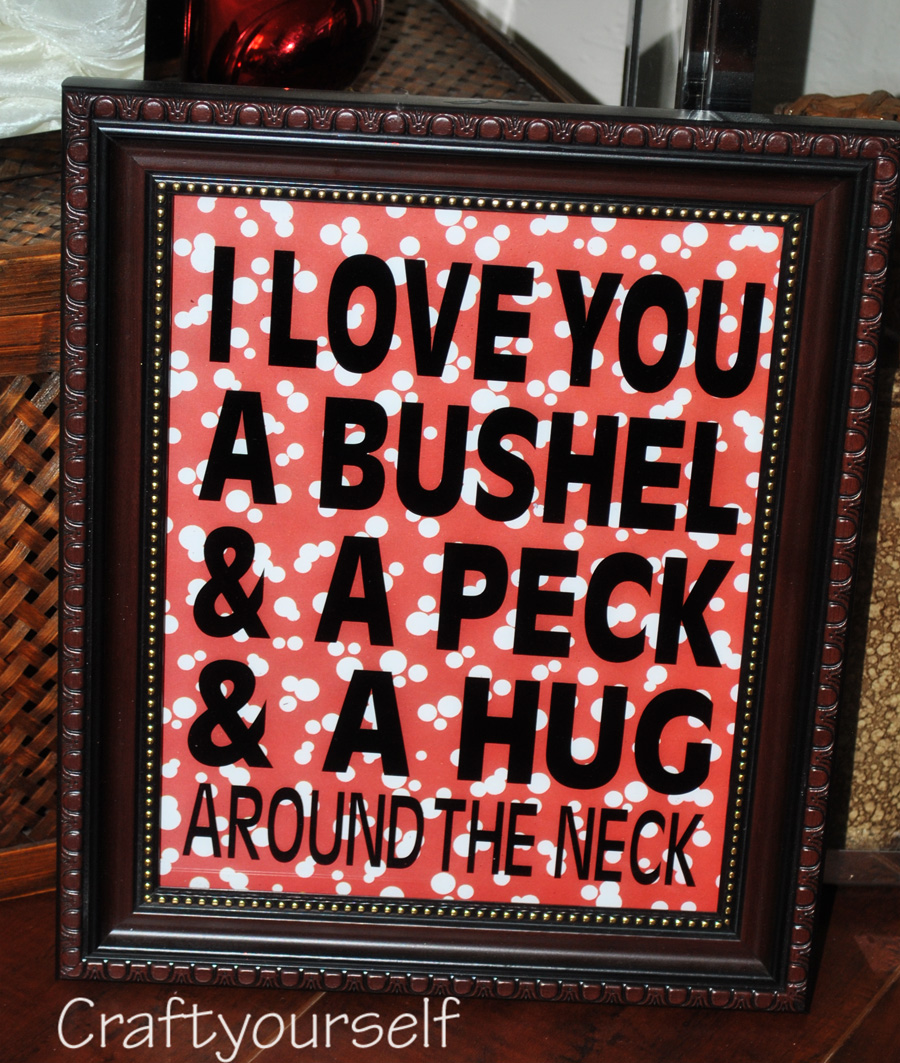
I did the subway art with a piece of wood then just did reverse vinyl (tutorial to come) I also did the canvas with the chevron stripes (tutorial to come)
My mom had an old mirror from her downstairs bathroom that she gave me over a year ago. I pulled it out of my craft room and had my husband add a frame around it out of wood. My husband used liquid nails and glued the frame straight onto the mirror. Using the mirror as the focal point of my sister’s striped wall added a nice touch.
She could easily add some sconces to either side of the mirror.

She wanted to also add some Yellow highlights so this is where the lamp redo and coffee table redo came into place. Notice the cute yellow lamps with new lamp shades? Love spray paint. The coffee table and end tables were a bit of another story.. We just couldn’t get the chevron stripes to go the way we wanted to and we didn’t have all day to spend on them so the coffee table only ended up with stripes on each end.. That’s okay though because the still look cute that way! We spray painted a magazine holder in a turquoise color and also painted a few candle holders in turquoise.
The day moved fast and next thing we knew it was midnight! I was bound and determined to finish the project! I had my sister pick up some cafe’ clips for her curtain rod and I sewed two panels for each side of her window. Now I did them as decorative curtains not to be used so the panels are thinner than normal more just for a focal point of the room.
Last but not least the picture off to the left was just an individual 8 x 10 picture she had of Christ. It was such a beautiful picture that I wanted to accent it. We took the brown frame around the picture and painted it white. I then took a larger frame and painted it white. We took the back of the frame and wrapped it in yellow fabric then inserted it back into the frame. I then took the picture of Christ and mounted it back onto the larger frame using the Velcro picture hangers by 3M I hung it in the center of the larger frame. It looks like one frame in all but it is actually two.
 I really enjoyed doing this project and like all other project there are always touch ups and accents that would be fun to add (like some cute pillows) but overall it was a great day! I enjoy spending time with my sister doing what I love (crafting) With a little help of Coke zero, chocolate licorice and a lot of laughter we got it done!! Go check it out on her blog: Babes and Kids Review She too will be highlighting her living room make over!

One Comment
Tiff @ Babes and Kids
I am so SO grateful for you and your talent. It took a lot of work to pull this off. 🙂