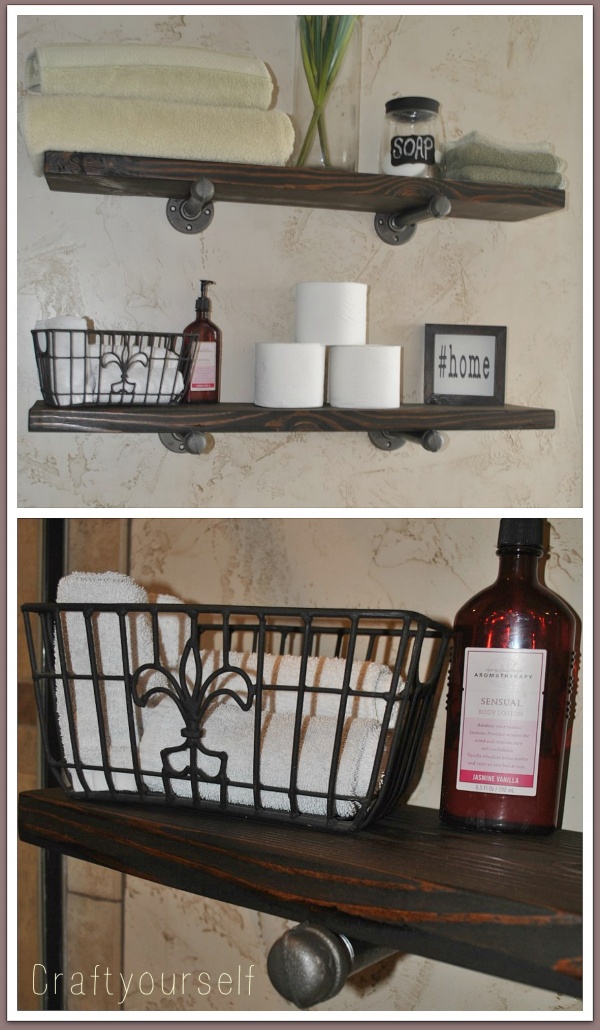
Handmade Shelving DIY using Industrial Piping
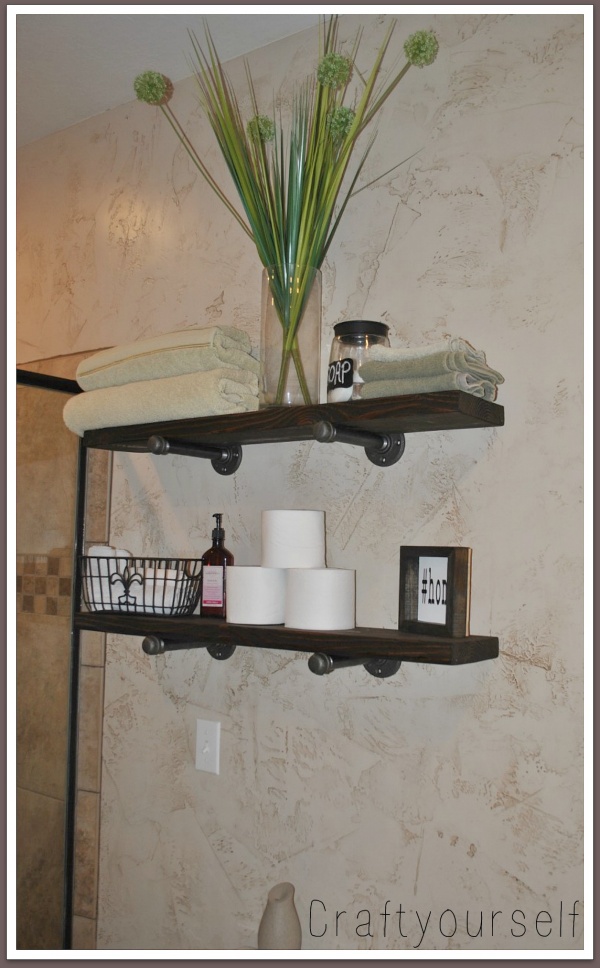
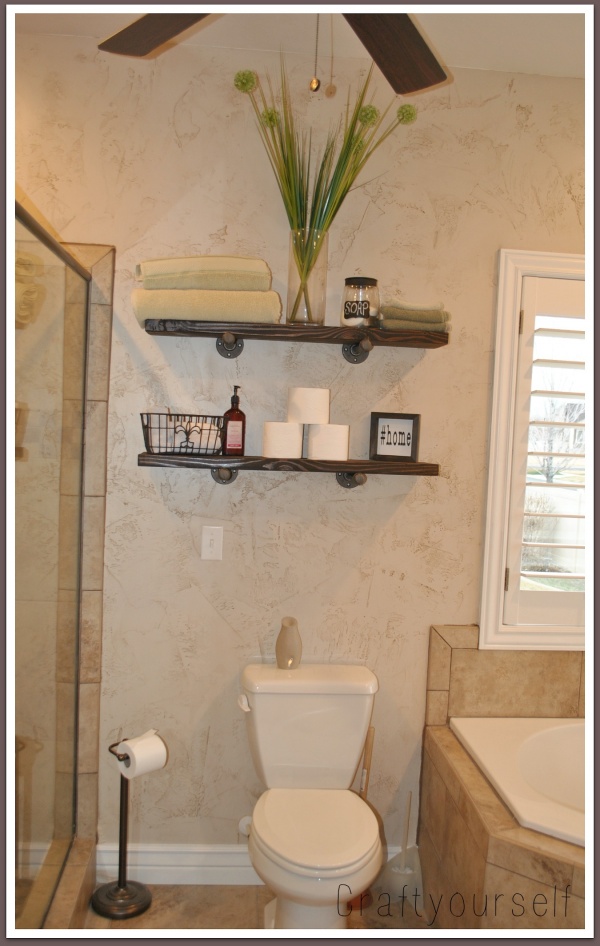
This Handmade Shelving using Industrial Piping is a quick Saturday afternoon project that will seriously change the look of any room! There are tutorials all over the web for these type of shelving so this is probably nothing new. Simplifying was the route I used. (Yes that is a ceiling fan in my bathroom- best decision ever)
First gather your supplies.
You will need:
1- 8 foot long 2″ x 8″ Fir Wood. Cut in half to make 4 foot lengths.
Table saw or chop saw to cut the wood (If you don’t have a saw you can have your local wood store cut it)
Hardware needed:
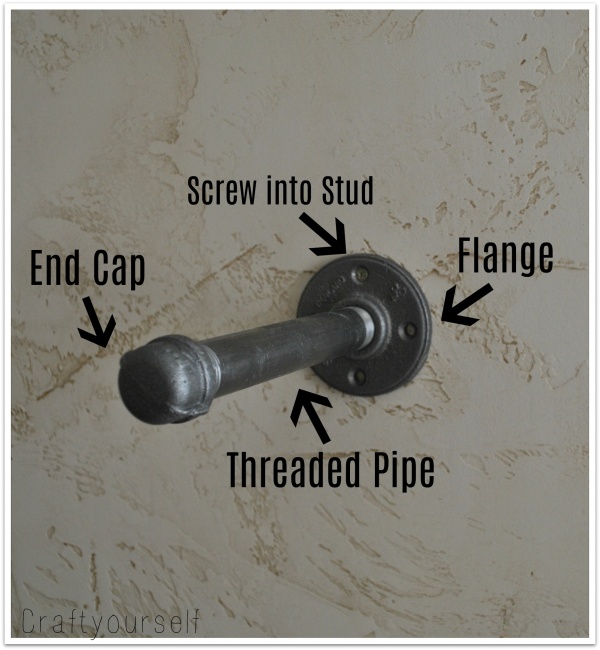
4 – 3/4″ Threaded Flange
4 – 3/4″ x 8″ Pipe
4 – 3/4″ Cap ends
1 – can of Minwax Dark Walnut Stain
Paint brush and Power drill
Stud finder
4 – 1 1/2″ screws – to Screw the Threaded Flange into the wall
What you see in the photo below is how the piping came and as I bought it. The color was already perfect for the look I wanted and I wasn’t in the mood to spray paint the pipe. However that did take away an extra step in the process.
If you can, use screws you already have on hand (My screws are not dark but you can’t really see the screws once in the wall). Therefore, if you are worried about the look of the screws in the walls you can always purchase dark screws. Forgoing the security straps also saves on cost. Only go without if there are no small Children in the home. Making these shelves kid safe is easy! All you have to do is purchase these 1/2-Inch Steel Two Hole Strap security straps. (You would have to spray paint these).
Since my shelves are in my master bathroom and I have no little people to worry about, I set the wood on top of the shelving pipes without securing them.
Once your board is cut to 4 ft. in length (The 8 ft. board cut in half) sand the edges and stain all sides of the 2 boards. In addition when staining you’ll want a day or two of drying time. Depending on how thick and how many coats of stain are on the boards.
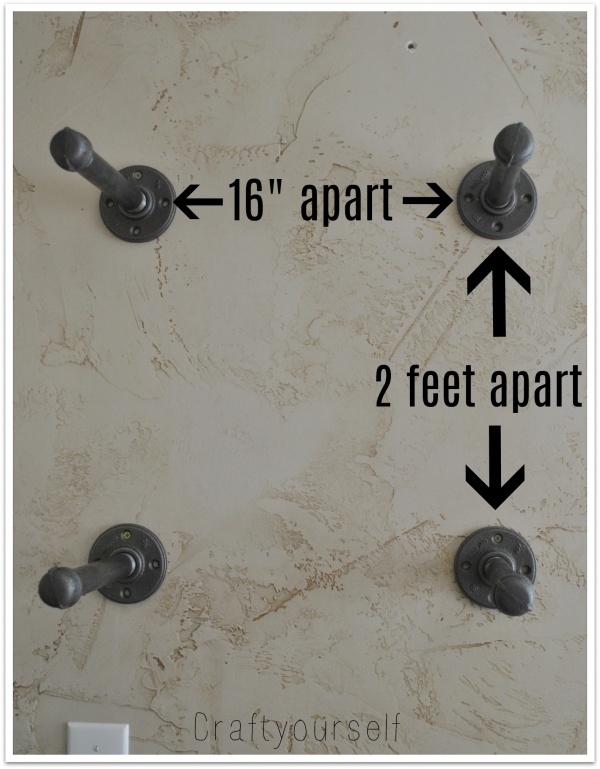
It is nice to put the piping right into studs, as I did. Notably most studs are 24″ on center and mine are 16″ apart so the pipes are a little closer together. Depending on how you want your shelving spaced you may need anchors for your screws if not putting the screws into studs. Even so, my piping is closer together so I can have them screwed into studs.
Usually, I like to have cost saving projects for my readers but I have to say this is not a project that is cheap. Overall the shelving came to around $50 in cost. Metal Flanges are the most costly part of the project but worth it! Although I can’t deny the shelves are simply amazing!

You May Also Like
Timber Wood Candy Cane
Witch Hat candy count down