Simple and Easy Board and Batten Wall
Let me preface this post by saying this is the easy way to do a Board and Batten wall. No removal of any baseboard and no cutting around any outlets. Cost effective because there are no sheets of wood – yes folks I used the wall for my backing. For the most part I like to keep things simple. So here we go!
First take a look at the wall or room that you would like to add the Board and Batten to. Ask yourself these questions – What is the overall measurement of the length of the wall? Can you stack the vertical strips on top of your current baseboards or do you need to rip those out and buy new one’s? (we left baseboards alone and stacked) How tall do you want the Board and Batten? How much space do you want between each vertical slat? Look at how to finish the edges of the Board and Batten – will it butt into another wall or will you need to finish it off?
Let’s gather the supplies on our list!
You’ll need:
Hook strip MDF 1/2 inch thick and 3 inch wide. Cut the MDF to the height you want it. (We went 5′ tall) for the vertical strips
Base & Casing 3 1/2 inch wide x 3/4 inch thick MDF For along the top of the vertical strips. (cut to length of wall)
Crown Molding 3 1/2 inch wide to set above the Base and Casing at the top. (cut to length of wall)
Brad Nailer
2 inch Brad nails
Stud finder
Wood filler (to fill in the nail holes)
Hand saw or chop saw – to cut the slats, base & crown molding.
Level
Paintable caulking.
Sand paper
Paint primer.
White satin or semi-gloss interior house paint.
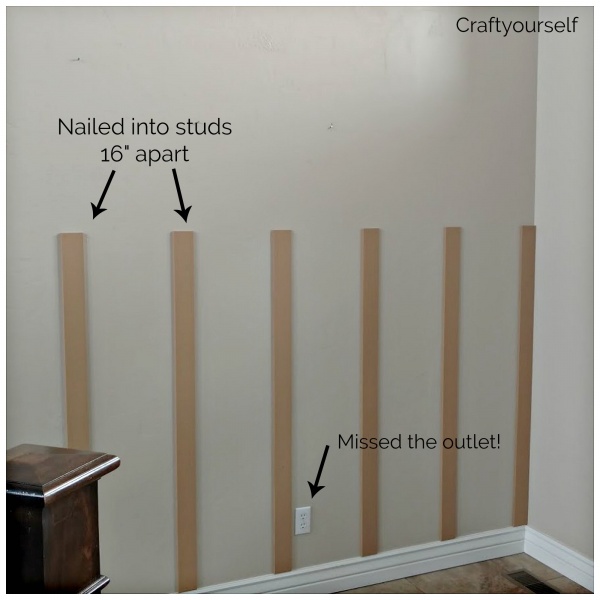
Second step and the easiest way (at least for us) is to measure the wall and then divide it by how many vertical slats you will have and how far apart each vertical slat will be. Most studs are 24 inches apart but the studs in our home are 16 inches apart. Using a stud finder will determine how far apart the studs in your home are. Luckily we have an awesome framer and we were able to nail them into the studs. We were also lucky in the fact that we avoided an outlet and didn’t have to cut around anything!
My advice is to pick easy walls to do this on – Ha! Working from the bottom up makes the project easy too. Although, I have seen where some tutorials nail the base and casing to the middle of the wall from the start. Vertical strips can be visually lined up to get the jist before nailing them onto the wall. Set each strip on the top of your casing (baseboard in our case) and use the level along the side of each strip before nailing to make sure it is sitting straight. Nail each slat in several places onto the wall and repeat all the way down the wall.
You’ll want to make sure that you sink the nails deeper than the wood because you can fill the holes in with wood filler to hide the holes. If you have anything you need to cut around a dremel comes in handy to make the cuts.
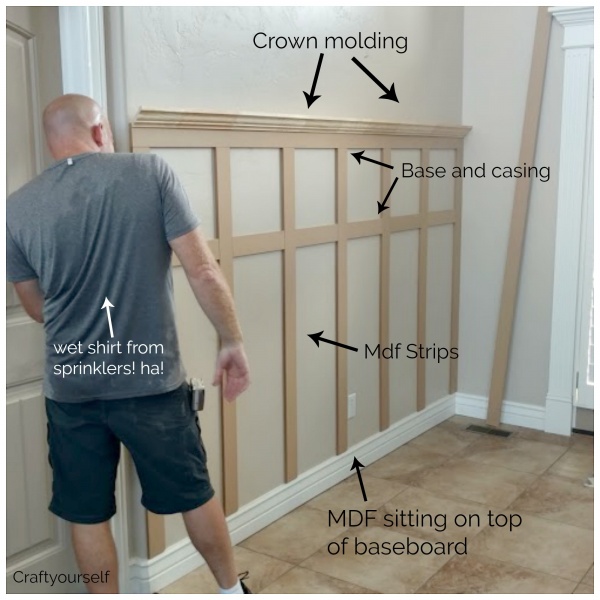
Once the slats are all nailed in place set the base and casing on top then nail it to the wall. There really is no need to use liquid nails as the nails that are being put into the wall work just fine. Last step in this part is to stack the crown molding on top of the base and casing and nail it to the wall.
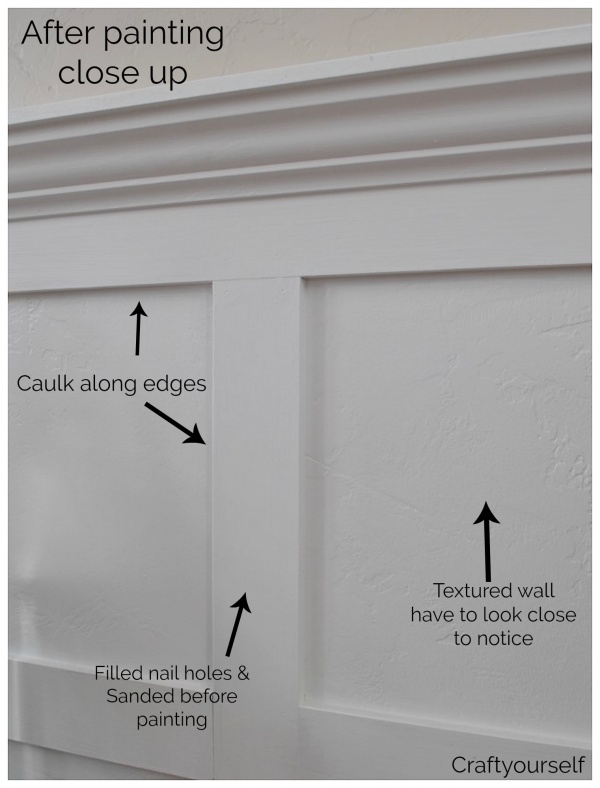
Fill all the holes with wood filler – yes this takes a bit of time. Let the wood filler dry then sand, sand, sand until all of the wood feels smooth and ready to paint. Caulk around the edges of each slat and on top of the crown molding to make sure the wood transitions nicely into the wall. Using my finger to go over the caulking to smooth it over and push it into the creases. Remember my tip to make sure that the caulk is one you can paint over. Make sure that there is no excess dust on the wood by wiping it down before painting with the primer.
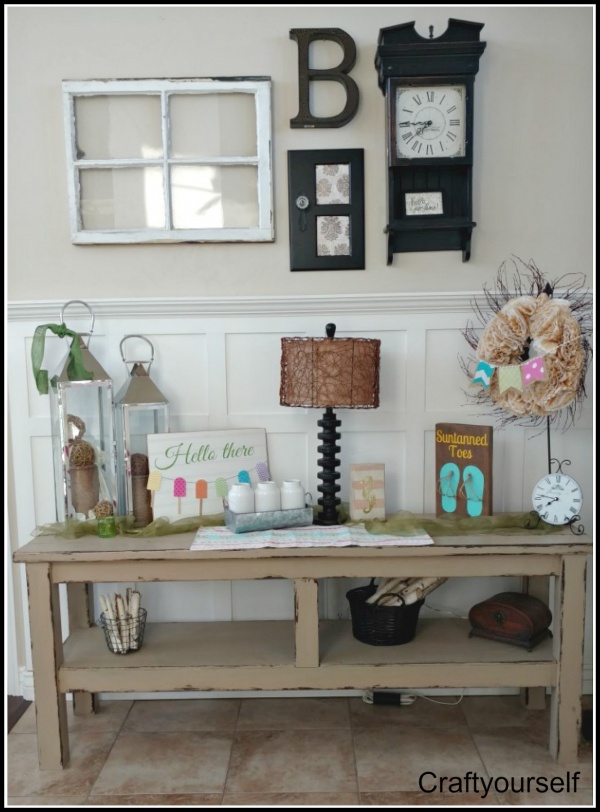
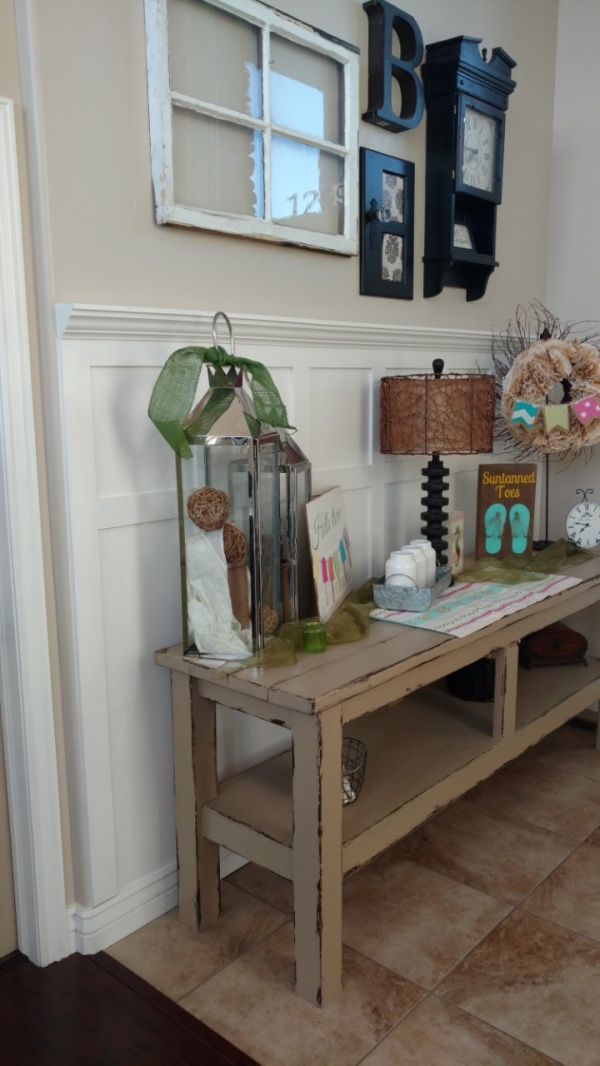
Finally, I’ve included a photo of how we finished off the end of the board and batten below.


You May Also Like

DIY Designer Halloween Plates & Severed Finger Goulash Recipe

Ice Skate Rentals